At the start of every year, I always find time to clean up my PC, reinstalling everything and deleting files I no longer need. One of the things I install and configurations I set up is my development environment. My most basic setup is a combination of CUDA, Docker, Git and VSCode. In this tutorial, I'll show you the step-by-step process of how I set up my environment.
Installing CUDA
First, you need to install CUDA. You can download the latest version of CUDA from the official NVIDIA website. To check your GPU version, go to Task Manager and select the 'Performance' tab. The GPU details are shown in the upper right corner as shown below.
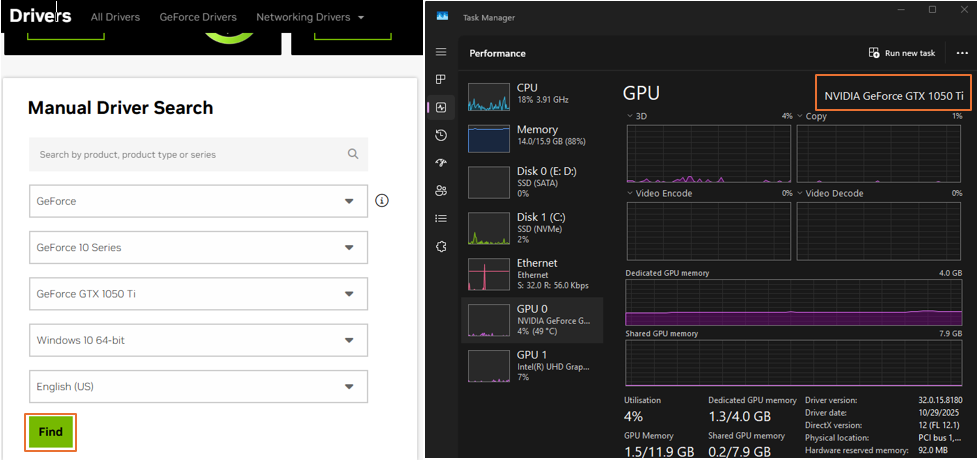 Task Manager Performance tab showing GPU information
Download the driver and install it. To verify the installation, open PowerShell and type:
nvidia-smi
You should see your GPU details and the supported CUDA version.
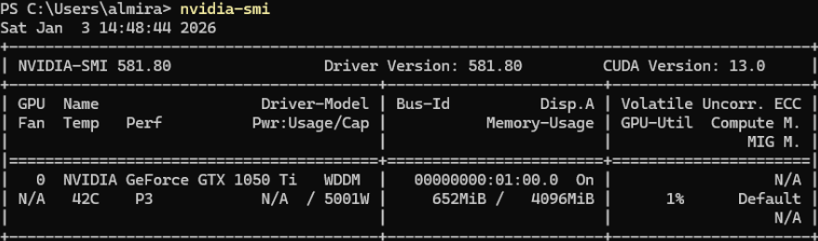 nvidia-smi command output showing GPU information
Installing WSL
Docker Desktop requires WSL2. Ensure that virtualization is enabled (you can check this in Task Manager). To install WSL, type the following command:
wsl --install
If you don't have a distribution installed yet in your WSL, you can install one by typing the following command. Here, 'Ubuntu' is the distribution name:
wsl --install -d Ubuntu
Installing Docker
Next, you need to install Docker. You can download the latest version of Docker from the official Docker website. Once installed, open Docker Desktop and ensure that "Use the WSL 2 based engine" is checked (see left image below) and the default distro is toggled (see right image below).
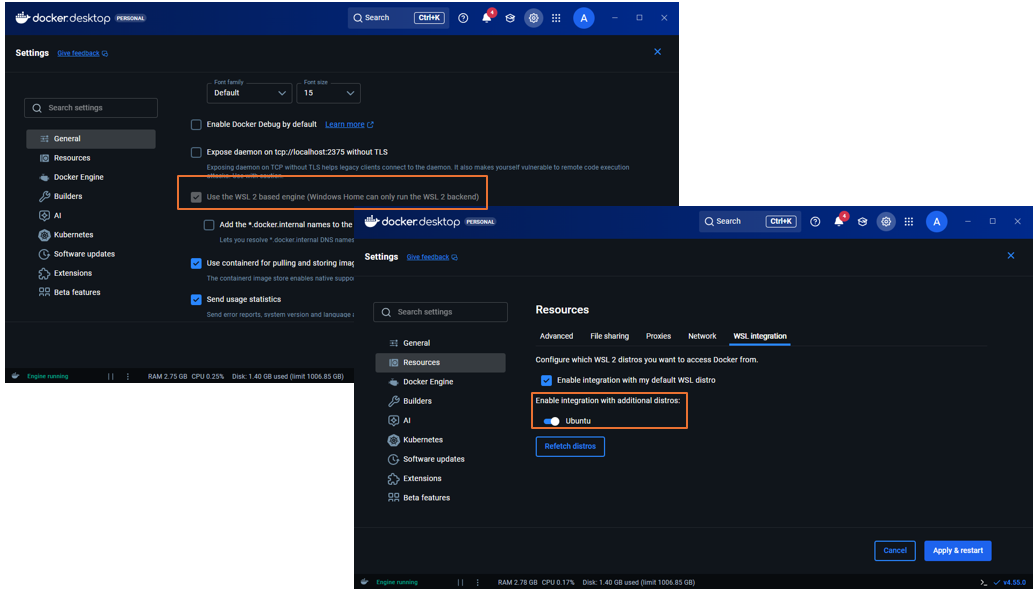 Docker Desktop WSL2 configuration settings
Verify that Docker can access your GPU properly by starting a container and running the 'nvidia-smi' command. Run the following to test this. The NVIDIA image is highly dependent on your CUDA version. Since my CUDA version is 13.0, I can only install NVIDIA CUDA images lower than or equal to this version (i.e., 12.6.0):
docker run --rm --gpus all nvidia/cuda:12.6.0-base-ubuntu22.04 nvidia-smi
Installing Git
Next, you need to install Git. You can download the latest version of Git from the official Git website and install it as usual. Open PowerShell and run the following command to generate an SSH key:
ssh-keygen -t ed25519 -C "your_email@example.com"
Next, run the following to copy your public key to GitHub, Bitbucket or anywhere you store your project code:
Get-Content .\.ssh\id_ed25519.pub | clip
Paste the public key to your project repository's SSH settings. Here's an example page from GitHub:
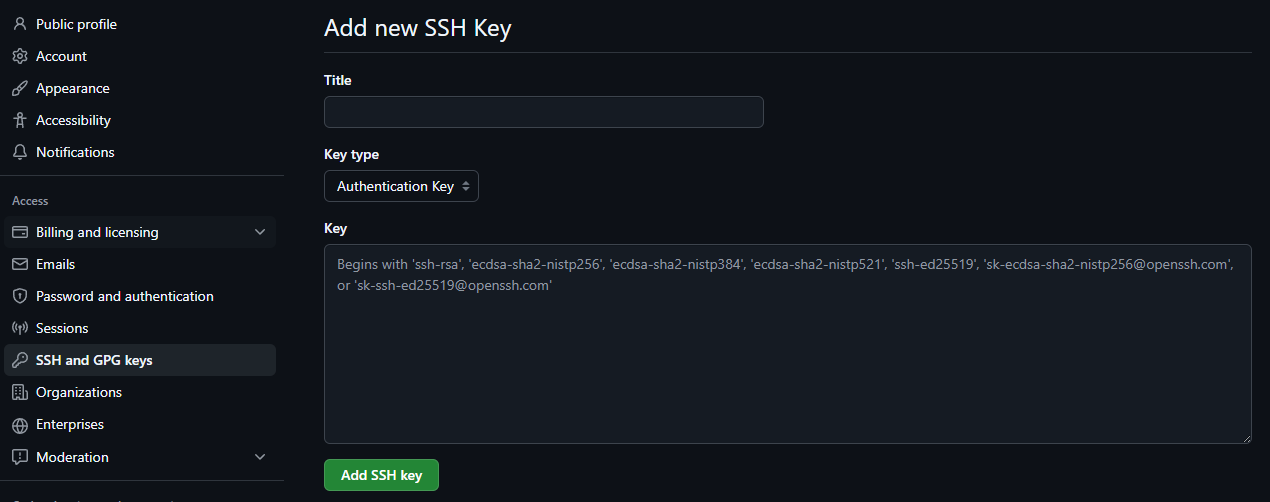 GitHub SSH key configuration page
Installing VSCode
Install VSCode as usual and start a container. To share the SSH key from your host machine to the Docker container, you need to make sure that the OpenSSH Authentication Agent is running and enabled. To do so, go to 'Services' and enable OpenSSH Authentication from there. You might need to restart your container for it to take effect. After that, you should be able to push and pull from your Git repository from your container without having to register SSH keys for your container.
 Windows Services showing OpenSSH Authentication Agent
Aaaannnddd...that's it! Happy coding!